MODDING Step by Step Tutorial

Discussion forum for Devil Whiskey 3rd Party MODS.

Moderator: Admin

User avatar
dragonbait
Stalker
Posts: 775
Joined: Mon Apr 10, 2006 3:07 pm

MODDING Step by Step Tutorial

Post by dragonbait »

I will attempt to make a Step by Step Tutorial for making a mod for the Devil Whiskey from start to finish. Here we go...


Step 1: Helpful tips, and Preparation (including basic Texmake use)
Firstly, before anything else, make sure you have downloaded and applied the Megamod to your DW game files.
(As always, make sure that you have a backup of the game and backup of your save files prior to applying the Megamod)
Also grab the DWTools package
Both of which can be downloaded at
http://www.weekendwastemonster.net/crpgs/dw/dw.html

Now that that is done, let's begin....
***MOST IMPORTANT= KEEP TRACK OF ALL THE FILES THAT YOU MAKE CHANGES TO. WRITE DOWN ALL CHANGES SO YOU REMEMBER***
We will want to first de-activate random monster encounters in some areas
so that we don't keep getting interupted as we set out to find a good location
spot for our new mod.
(It is important to notice that when testing a mod, that you use a new party. Using a party from an older saved game may end up not recognizing that you have disabled random encounters and/or have other game related issues.)

Start by opening renMonsters.cfg with Notepad or with whatever text editor you use.
You will see at the top of the file, there are 3 numbers
13 30 5

The number 13 correlates to the number of different monsters that you might possibly encounter within Rennibister
The monsters are listed below.

The number 30 relates to the frequency of random encounters which can be a number anywhere between 0-100
We will want to temporarily change this number to 0, and then save the file.

(Most areaMonster files only have 2 numbers) so I'm not sure exactly what the third number here does so we will just leave that be.

Next go to renwildMonsters.cfg
You will see the number 23 40
Temporarily change 40 to 0, and then save the file

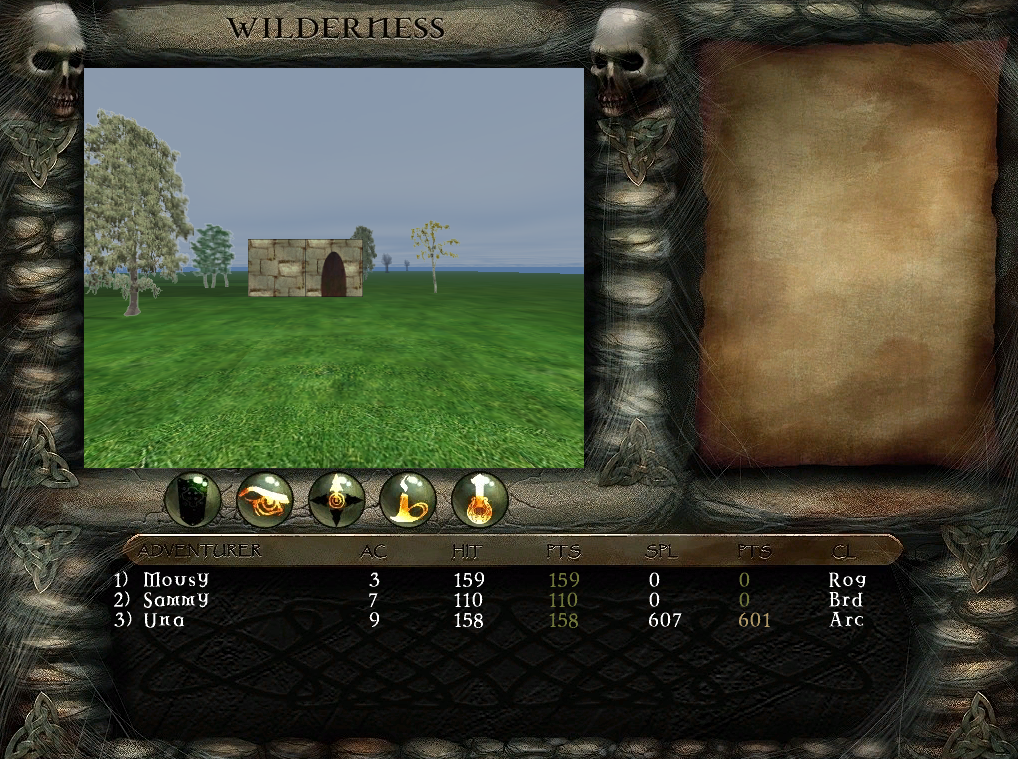
Now if you start the Devil Whiskey (and you are using a new party to test with)you won't get interrupted by any random encounters while you are in the Town of Rennibister, or while in the Wilderness
So now we go ahead and look around to find the perfect spot for our new creation.

You can even take it a step further and activate the cheaters stronghold so you can quickly generate a couple of characters that can easily blow through any battle that you create in the new mod.
Open renEvents.cfg
Find
#22 28 2000 1
#21 28 90 cheat
and remove the # symbol from both lines

The cheaters stronghold is located in the alleyway to the right of the temple

The wilderness still has a vast emptiness about it so we will have our creation built there.
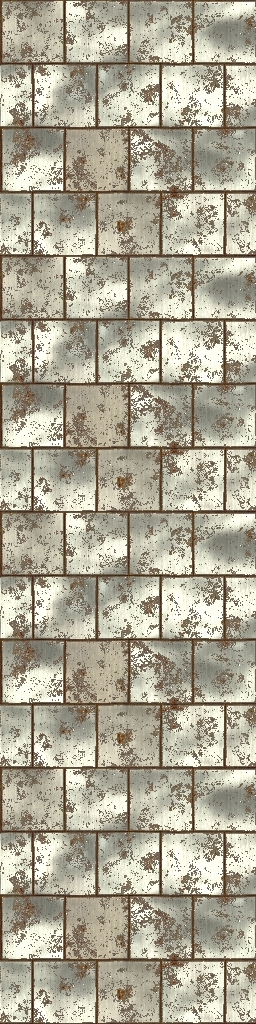
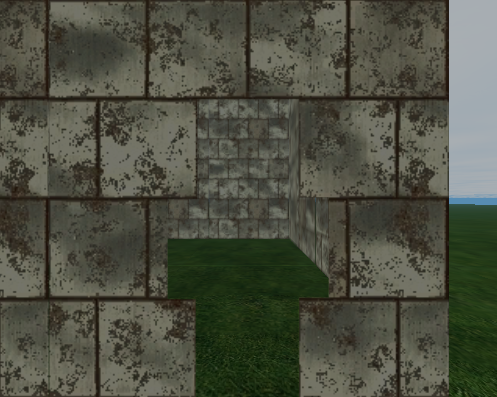
Before we start, I like to create some new wall textures.

We will start with wall textures that are 1 unit high, you need an image file that is 256x256 so use your Gimp or Photoshop etc. and when you have the final image the way you want it, save as .jpg
.jpg is the only format the texmake program will recognize.
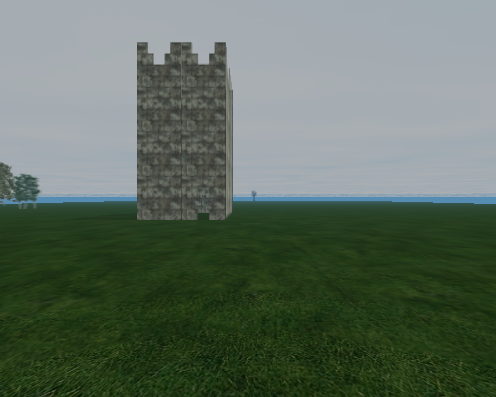
It is possible to make taller textures but for now we will use 1 unit in height.
It is also a good habit to have a particular format for all of your modding files so you can easily find all of your files once they have been added to the rest of the game files.
For this mod, we will add zz to the start of every file so they will all accumulate at the bottom of every list etc.
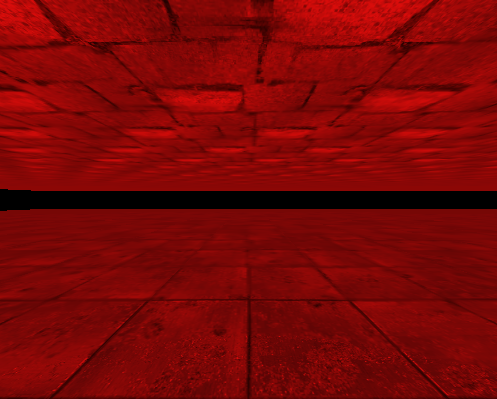
You can see some of the new .jpg wall, door and floor images here
http://www.weekendwastemonster.net/crpgs/dw/zzmod/

Now I take these .jpg images, and place them into the folder containing the Texmake program (Texmake is in the DWTools package)
Open up the command prompt and change the directory to the textures folder
C:\Program Files\DevilWhiskey\dwtools\tools\textures (or wherever it is on your machine)
and type the command as shown below.

Quoting RT...
******************************************************
Texmake is a command line program and is used in the following manner:

Code:
texmake <output file name> <input file name> <alpha channel file name> [reduction factor]


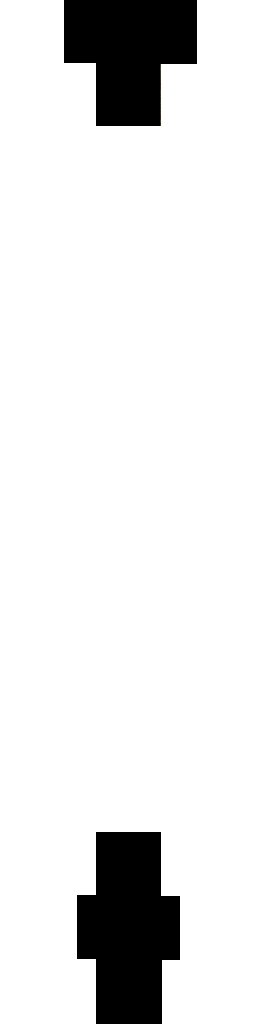
Output and input files are pretty self explanatory. The alpha file is used to create transparency in your textures. The reduction factor is optional and is used to control how much a tile is reduced for the "small" version. The small version is used when you see the texture from a distance when you are in the game.

To turn our test image into a game texture, use the following command:

Code:
texmake testimage.dat testimage.jpg NULL


That's it!

The file testimage.dat can now be used in the game.
*******************************************************
So for my mod, the code I typed for my first image was

Code: Select all

texmake zz_d1.dat zz_d1.jpg NULL
The texmake program then spits out a file called zz_d1.dat which I can now move into the pics/walls folder
Do the same for the rest of your other wall, door, floor images
Now that we have a bunch of new .dat files in the pics/walls folder, let's proceed to Step 2...
User avatar
dragonbait
Stalker
Posts: 775
Joined: Mon Apr 10, 2006 3:07 pm

Post by dragonbait »

Step 2: Walls, Cells and the Map configuration files
For further reference you can view the Map Tutorial

Since our new mod will be located in the Wilderness, we need to access renwildWalls.cfg

I add in the following text to the bottom of the file and then saved.

Code: Select all

#  NEW WALLS added with Shrine of the Fire God mod
#Nodename       Filename    Collision&#40;non-zero=true&#41;     Special Type &#40;0=standard, 1=secret door, -1=floor&#41; Height &#40;default=1, max 4&#41;
zzrustw             pics/walls/zzrust.dat             0       -1
zzwall1             pics/walls/zz_wall1.dat           1       0
zzdoor              pics/walls/zz_door.dat            0       0
zzenter             pics/walls/zz_enter.dat           0       0
zzmossbrick         pics/walls/zz_mossbrick.dat       0       -1
zzflame             pics/walls/zz_flame.dat           0       -1
The nodenames are what we will call each of the new images when applying them in the cells file.
The filename is the actual filename with location
There are 3 possible columns although for now we are only using 2, as all of my images are 1 unit in height (the default).
Collision, Special Type, Height, as described above

Now we need to access renwildCells.cfg
to create each cell type and what walls each cell will have

Code: Select all

#
#  NEW CELLS added for Shrine of the Fire God mod
#
#CellName       <North> <West>    <South>   <East> <type><floor><garnish>
DEFAULT         NULL    NULL       NULL      NULL     0    NULL    NULL
zzdoor_S        NULL    NULL       zzdoor    NULL     0        
zzwall1_SW      NULL    zzwall1    zzwall1   NULL     0
zzwall1_S       NULL    NULL       zzwall1   NULL     0
zzwall1_W       NULL    zzwall1    NULL      NULL     0
I added the above new cells. The direction of each cell walls are shown.
So far we are only using the zz_door.dat & zz_wall1.dat images, although we have a few others to choose from for future use.

Make sure you have saved both the renwildWalls.cfg and renwildCells.cfg

Now we move on to the renwild.cfg fle
I then add in

Code: Select all

#
#  NEW LOCATIONS added with Shrine of the Fire God
#
106 101 tree3
107  98 tree4
108  96 tree2
108 100 zzwall1_SW
108 101 zzwall1_W
108 102 zzwall1_S
109 100 zzdoor_S
109 102 zzwall1_S
110 100 zzwall1_W
110 101 zzwall1_W
110 103 tree4
110 104 tree3
111 100 tree1
These are the X / Y Coordinates of the map of the Rennibister Wilderness area, and the related cell names that we made previously in the renwildCells.cfg file

So to sum it all up, in the renwildWalls.cfg file we set up walls to access the .dat images
We then make cells in the renwildCells.cfg file which access the wall data
and we finally place the cells on the renwild.cfg map file where they then show up in the game.

The area around the shrine was a bit bland so I added in some of the already available tree cells to the area surrounding the shrine.
Last edited by dragonbait on Sun Feb 05, 2012 8:51 pm, edited 3 times in total.
User avatar
dragonbait
Stalker
Posts: 775
Joined: Mon Apr 10, 2006 3:07 pm

Post by dragonbait »

Here is a sample of what it looks like now.
Image

Next up some scripting....
User avatar
chaney
Stalker
Posts: 683
Joined: Tue Nov 08, 2005 9:51 am
Location: San Diego

Post by chaney »

Alright,
I have tried the Texmake program,and discovered some quirks, and ways around them. Some of my attempts were pulled from other sites (which are free and encouraged by the sites). I discovered that on some of them, you can save a jpg and compress to 256 X 256, an Texmake will still say unable to open. The way I got around it, is to open the pic with Windows Paint, and then save as a jpg. Even though it was a jpg, it wouldn't open, until I used this alternate method. I am willing to assist you D, with the walls, etc. (if you keep doing this great how to file). What I have an utter lack of, is imagination, so I can never come up with good plots, etc.
Bring on the Dancing Horses!
User avatar
dragonbait
Stalker
Posts: 775
Joined: Mon Apr 10, 2006 3:07 pm

Post by dragonbait »

Before I get into some scripting, perhaps I should briefly go into Texmake's use of Alpha. This will allow us to design that squarewave style topping that we see on the tops of towers + stone walls and also to make windows, doorways and other such visual effects.

We can create textures between 1 height unit up to a maximum of a 4 height unit.
1 unit in height requires 256x256 .jpg image
2 units in height requires 256x512 .jpg image
3 units in height is supposed to use 256x768 however this doesn't seem to be supported so the workaround is to use 256x512 and allow the image to be stretched.
4 units in height requires 256x1024 .jpg image

In reference to the 3 unit height issue I quote Shadowknight
1) The reason 256x768 isn't supported has nothing to do with texmake, and everything to do with limitations of OpenGL (without using non-power-of-2 textures, which are a relatively recent addition to the spec) - so no, texmake will not support 256x768 in the near future (ok, I'm not a developer anymore, so I can't be absolute, but let's say it's very unlikely). You *can* if you want high-res 3-unit walls, use 256x1024 and they will be shrunk. But it should also be noted, that having 256x512 and stretching it (as long as it's properly designed) won't actually have a noticable effect on resolution, because the resolution of the rendered image is very rarely (if ever) more than 512 pixels high, anyway.

2) You can use taller walls in-doors, as well as out-doors, but the 'height' is measured from the ceiling, and you need to be very careful in architecting your level so that you don't have holes. Using height 4 ceilings in-doors, however, can create some very nice dungeon effects!

3) The reduction factor is optional, and if not specified, defaults to 2 (IIRC). This is used to create the lower-resolution textures used in the reduced quality modes for the game.
So let's go all out and make a tower at 4 height units and use some alpha.

I have a .jpg image that is 256x1024 in size and also 2 images of the same size that we will use as alpha images. The first alpha image is that of a tower wall and the second is that of a tower door. The black part of the image is what will be removed (see through) from the tower.

Image---Image---Image

As before we put them into the texmake program in the following format

Code: Select all

texmake <output file name> <input file name> <alpha channel file name> &#91;reduction factor&#93;
so for my images I typed the following to make a tower wall image

Code: Select all

texmake zzrustytower.dat rustytower.jpg rustytower_a.jpg 
and the next to make a tower door image

Code: Select all

texmake zzrustytdoor.dat rustytower.jpg rustytower_a_d.jpg
again move both of the new .dat files into the pics/walls folder and then I add to the renwildWalls.cfg (the third number of each line indicates it is 4 units high)

Code: Select all

zzrustytower    pics/walls/zzrustytower.dat     1       0       4
zzrustytdoor    pics/walls/zzrustytdoor.dat     0       0       4
& Save.

Then we add in cells into renwildCells.cfg

Code: Select all

DEFAULT         NULL            NULL            NULL             NULL           0    NULL    NULL
zzrustytower_S  NULL            NULL            zzrustytower     NULL           0
zzrustytower_SW NULL            zzrustytower    zzrustytower     NULL           0    
zzrustytdoor_S  NULL            NULL            zzrustytdoor     NULL           0
zzrustytower_W  NULL            zzrustytower    NULL             NULL           0
And finally we find a place for it out in the Rennibister Wilderness.
Update the renwild.cfg with the tower's location

Code: Select all

118 100 zzrustytower_SW
118 101 zzrustytower_W
118 102 zzrustytower_S
119 100 zzrustytdoor_S
119 102 zzrustytower_S
120 100 zzrustytower_W
120 101 zzrustytower_W
And let's view how it turned out....
Image----Image
Last edited by dragonbait on Sun Nov 13, 2011 8:50 am, edited 1 time in total.
User avatar
Growler
Necrolord
Posts: 1740
Joined: Mon Feb 14, 2005 10:37 pm
Location: Sputnik
Contact:

Post by Growler »

That's impressive, Dragon.. I'd be playing along if not already so busy with making chip-monkeys cry ;)

Interested to keep an eye on progress here. :P
No Contraries : No Progression.
Opposition is true friendship, unless one is opposed to true friendship or (try) Resisting here http://www.cafepress.com/notheresistor
User avatar
dragonbait
Stalker
Posts: 775
Joined: Mon Apr 10, 2006 3:07 pm

Post by dragonbait »

Damn. I've been tinkering with a new dungeon for the past hour or 2 trying to figure out what was making my new dungeon CTD at entry point. Finally I figured that I didn't have a DEFAULT setting in my dungeon's Cell .cfg file.

Make sure all of your Cell files have

Code: Select all

DEFAULT     NULL    NULL    NULL    NULL   0   NULL   NULL
somewhere (preferably at the top) of the file, otherwise you may have trouble accessing your newly made dungeon. I have updated my previous posts to include the DEFAULT cell info.
User avatar
chaney
Stalker
Posts: 683
Joined: Tue Nov 08, 2005 9:51 am
Location: San Diego

Post by chaney »

A little rusty perhaps? :)
Bring on the Dancing Horses!
User avatar
dragonbait
Stalker
Posts: 775
Joined: Mon Apr 10, 2006 3:07 pm

Post by dragonbait »

Unfortunately, that is so true. :lol:

Moving onwards, the first script that you may want to include is a dungeon entry point. A script that takes your party from above ground to dark into the depths.

A basic stairway script will look like...

Code: Select all

#zzshrine in
from eventAPI import *
from APIUtils import *

def fireEvent&#40;e&#41;&#58;
    showPicture&#40;e, "Stairs"&#41;
    if &#40;poseYesNo&#40;e,
        &#91;"Upon entering the building you notice a stairway leading downwards.",
         "Do you descend?"&#93;&#41;&#41;&#58;
        tickGame&#40;e, 60&#41;
        setExit&#40;e, "maps/zzshrine.cfg", 11, 18, 270&#41;
    return 0
The number 11, 18, 0 refer to the x / y coordinates and the direction that the party is facing.
The direction can be one of the following...
0 = North
90 = West
180 = South
270 = East


You can use the * in place of calling actual commands.

Or instead of the * you could use...

Code: Select all

from eventAPI import showPicture, tickGame, setExit
from APIUtils import poseYesNo
This script is saved as zzshrineIn.PY
and placed onto the data/scripts folder

See the DW Scripting Tutorial for more info.

*You Also need to add in an Event into the renwildEvents.cfg file so that when you step onto the square containing the script it will activate.*
We add the following line to the renwildEvents.cfg file...

Code: Select all

#New Events added with Shrine of the Fire God Mod
#
109 100 2000
110 100 0 zzshrineIn
But from here you need to have a dungeon already created so when the game accesses maps/zzshrine.cfg it has somewhere to go to.

We will need to create multiple files for our new dungeon.

Let's start with a walls file. We will name it zzshrineWalls.cfg
and the code we will place into it it...

Code: Select all

#zzshrineWalls.cfg
#Nodename       Filename    Collision&#40;non-zero=true&#41;     Special Type &#40;0=standard, 1=secret door&#41; Height &#40;default=1, max 4&#41;
#
#  NEW WALLS added with Shrine of the Fire God mod
#
zzrustw         pics/walls/zzrust.dat           0       -1
zzwall1         pics/walls/zz_wall1.dat         1       0       
zzdoor          pics/walls/zz_door.dat          0       0
zzenter         pics/walls/zz_enter.dat         0       0
zzmossbrick     pics/walls/zz_mossbrick.dat     0       -1
zzflame         pics/walls/zz_flame.dat         0       -1
Then we need a Cells file.

Code: Select all

#zzshrineCells.cfg
#
#  NEW CELLS added for Shrine of the Fire God mod
#
#CellName       <North> <West>     <South>  <East> <type><floor><garnish>
DEFAULT         NULL    NULL       NULL      NULL     0    NULL    NULL
zzdoor_S        NULL    NULL       zzdoor    NULL     0       
zzwall1_SW      NULL    zzwall1    zzwall1   NULL     0
zzwall1_S       NULL    NULL       zzwall1   NULL     0
zzwall1_W       NULL    zzwall1    NULL      NULL     0
zzenterWdSw     NULL    zzenter    zzwall1   NULL     1       zzflame  NULL
zzDsWw          NULL    zzwall1    zzdoor    NULL     0
zzwall1_WfI     NULL    zzwall1    NULL      NULL     1       zzflame  NULL
zzwall1_SfI     NULL    NULL       zwall1    NULL     1       zzflame  NULL
zzflamefloor    NULL    NULL       NULL      NULL     1       zzflame  NULL
zzwall1_SWfI    NULL    zzwall1    zzwall1   NULL     1       zzflame  NULL
Notice the DEFAULT cells. This is important. 8)

We will also need a main .cfg file

We will call ours "zzshrine.cfg" and it will initially......contain the following code...

Code: Select all

zzshrine 30 30 pics/walls/zzrust.dat pics/walls/zz_wall1.dat pics/other/wilderness.dat
maps/zzshrineWalls.cfg maps/zzshrineCells.cfg maps/zzshrineEvents.cfg maps/zzshrineMon.cfg
SPECLITE 0.4 0.0 0.0 0.0 0.8 0.0 0.0
audio/config 1
MageTower.dat 1
SPECCELL 11 18 0
#11 20 1 7
#25 26 2
RANDITEMS 3
Sprite_Wand 15
Eelskin_Gloves 12
Eelskin_Armor 10
#col
#col1
This is not complete.
There are parts to this which we want to modify based on whatever you deem fit to be contained within your level.

If you look at the code you find the first pieces are
zzshrine (this is the name we will call our level. the file name will be zzshrine.cfg)
The 30 30 means the x / y size of the dungeon's map. (You want to always make sure that you have some extra room here. For example, the dungeon I have drawn out on graph paper displays a 12 x 12 map and starts from point 10E to 10N to 22E to 22N
A 30x30 map will allow us to have enough room in case we wanted to add in anything later.

The "pics/walls/zzrust.dat" is the floor image
The "pics/walls/zz_wall1.dat" is the ceiling image

The SPECLITE line =
The keyword SPECLITE followed by the flighting values, 7 real numbers ranging from 0.0 to 1.0 (inclusive) - with values for the following fog/colors:
fr - fog color - red
fg - fog color - green
fb - fog color - blue
fd - fog density (0.0 is no fog)
lr - ambient light - red
lg - ambient light - green
lb - ambient light - blue

With a current use of the following SPECLITE line...
SPECLITE 0.4 0.0 0.0 0.0 0.8 0.0 0.0
This is what it will look like...


Image

You can change the fog and or color of ambient light to your desire.
Next add in the doors + walls to your dungeon...
Last edited by dragonbait on Sun Feb 05, 2012 7:56 am, edited 1 time in total.
User avatar
dragonbait
Stalker
Posts: 775
Joined: Mon Apr 10, 2006 3:07 pm

Post by dragonbait »

Here is a quick video of what we have so far.
http://www.youtube.com/watch?v=z2Pn1Qq6Y2s

The walls and doors are all defined in the zzshrine.cfg file now.

Code: Select all

zzshrine 30 30 pics/walls/zzrust.dat pics/walls/zz_wall1.dat pics/other/wilderness.dat
maps/zzshrineWalls.cfg maps/zzshrineCells.cfg maps/zzshrineEvents.cfg maps/zzshrineMon.cfg
SPECLITE 0.8 0.0 0.0 0.5 0.1 0.0 0.0
audio/config 1
MageTower.dat 1
SPECCELL 11 18 0
#11 20 1 7
#25 26 2
RANDITEMS 3
Sprite_Wand 15
Eelskin_Gloves 12
Eelskin_Armor 10
#col
10 10 zzwall1_SW
10 11 zzwall1_W
10 12 zzwall1_W
10 13 zzwall1_W
10 14 zzwall1_W
10 15 zzwall1_W
10 16 zzwall1_W
10 17 zzwall1_W
10 18 zzwall1_W
10 19 zzwall1_W
10 20 zzwall1_W
10 21 zzwall1_W
10 22 zzwall1_S
#col1
11 10 zzwall1_S
11 11 zzwall1_SW
11 12 zzwall1_W
11 13 zzwall1_SW
11 14 zzwall1_S
11 15 zzwall1_SW
11 16 zzwall1_SW
11 17 zzwall1_S
11 18 zzwall1_SW
11 19 zzwall1_SW
11 20 zzwall1_W
11 21 zzwall1_S
11 22 zzwall1_S
#col2
12 10 zzwall1_S
12 11 zzwall1_S
12 12 zzwall1_S
12 13 zzwall1_S
12 14 zzwall1_S
12 15 zzdoor_W
12 16 zzdoor_W
12 18 zzwall1_S
12 19 zzwall1_S
12 20 zzwall1_S
12 21 zzwall1_S
12 22 zzwall1_S
#col3
13 10 zzwall1_S
13 11 zzdoor_W
13 12 zzwall1_SW
13 14 zzwall1_W
13 15 zzwall1_W
13 16 zzwall1_W
13 17 zzwall1_SW
13 19 zzwall1_SW
13 20 zzdoor_W
13 22 zzwall1_S
#col4
14 10 zzwall1_SW
14 11 zzdoor_S
14 12 zzwall1_SW
14 13 zzwall1_S
14 14 zzwall1_SWfI
14 15 zzwall1_WfI
14 16 zzenterWdSw
14 17 zzwall1_WfI
14 18 zzwall1_S
14 19 zzwall1_SW
14 20 zzwall1_S
14 21 zzDsWw
14 22 zzwall1_S
#col5
15 10 zzwall1_SW
15 12 zzwall1_S
15 14 zzwall1_SfI
15 15 zzenterWdSw
15 16 zzwall1_WfI
15 17 zzwall1_SfI
15 18 zzwall1_S
15 21 zzwall1_W
15 22 zzwall1_S
#col6
16 10 zzwall1_S
16 12 zzwall1_S
16 14 zzwall1_SfI
16 15 zzwall1_SfI
16 16 zzflamefloor
16 17 zzwall1_SfI
16 18 zzwall1_S
16 22 zzwall1_S
#col7
17 10 zzwall1_SW
17 11 zzdoor_S
17 12 zzwall1_S
17 13 zzwall1_S
17 14 zzwall1_SfI
17 15 zzwall1_WfI
17 16 zzwall1_WfI
17 17 zzflamefloor
17 18 zzwall1_S
17 19 zzwall1_S
17 20 zzwall1_S
17 21 zzDsWw
17 22 zzwall1_S
#col8
18 10 zzwall1_SW
18 12 zzwall1_SW
18 14 zzwall1_W
18 15 zzwall1_W
18 16 zzwall1_W
18 17 zzwall1_W
18 19 zzwall1_SW
18 21 zzwall1_W
18 22 zzwall1_S
#col9
19 10 zzwall1_S
19 11 zzDwSw
19 12 zzwall1_SW
19 13 zzwall1_S
19 14 zzwall1_SW
19 15 zzwall1_W
19 16 zzwall1_W
19 17 zzwall1_W
19 18 zzwall1_S
19 19 zzwall1_SW
19 20 zzDwSw
19 21 zzwall1_S
19 22 zzwall1_S
#col10
20 10 zzwall1_S
20 11 zzwall1_S
20 13 zzwall1_S
20 14 zzwall1_S
20 15 zzDwSw
20 16 zzDwSw
20 17 zzwall1_S
20 18 zzwall1_S
20 19 zzwall1_S
20 21 zzwall1_S
20 22 zzwall1_S
#col11
21 10 zzwall1_S
21 11 zzwall1_W
21 12 zzwall1_W
21 13 zzwall1_W
21 15 zzwall1_W
21 16 zzwall1_W
21 18 zzwall1_W
21 19 zzwall1_W
21 20 zzwall1_W
21 22 zzwall1_S
#col12
22 10 zzwall1_W
22 11 zzwall1_W
22 12 zzwall1_W
22 13 zzwall1_W
22 14 zzwall1_W
22 15 zzwall1_W
22 16 zzwall1_W
22 17 zzwall1_W
22 18 zzwall1_W
22 19 zzwall1_W
22 20 zzwall1_W
22 21 zzwall1_W
& an image of the layout as seen in the [tab] view map menu
Image
User avatar
chaney
Stalker
Posts: 683
Joined: Tue Nov 08, 2005 9:51 am
Location: San Diego

Post by chaney »

That Video is absolutely kick arse!! Are you making this a starting party mod, or high level? I really like the red fog effect.
Bring on the Dancing Horses!
User avatar
chaney
Stalker
Posts: 683
Joined: Tue Nov 08, 2005 9:51 am
Location: San Diego

Post by chaney »

In case you have never tried to post the word "AS%", it automatically get's changed to arse. :lol:
Bring on the Dancing Horses!
User avatar
Growler
Necrolord
Posts: 1740
Joined: Mon Feb 14, 2005 10:37 pm
Location: Sputnik
Contact:

Post by Growler »

Respect for figuring out all that arcane mod-info, and for sharing.
Really cool video.. nice dungeon map/layout.

Chaney, long as ye've been here--sure ye knew about the ASS to ARSE curse-conversion!?? 8)
No Contraries : No Progression.
Opposition is true friendship, unless one is opposed to true friendship or (try) Resisting here http://www.cafepress.com/notheresistor
User avatar
dragonbait
Stalker
Posts: 775
Joined: Mon Apr 10, 2006 3:07 pm

Post by dragonbait »

You'll probably also want to have your own title image for your dungeon.


Grab the blank title image below
http://home.comcast.net/~tavernx/images/titlebar.bmp

Open the image up in Gimp or Photoshop etc.
You can use Celtic Garamond the 2nd type font. (most realistic Rennibister font) and type the name of the dungeon.
Image

Make sure that when you have your text where you want it, then flip the image vertically and save it as a .JPG like so
Image

Now place the .jpg image into the folder containing the texmake program and use the command prompt again like

Code: Select all

texmake zzshrinetitle.dat shrine_title.jpg NULL
Once you have your newly created .DAT file, place the .DAT file in your pics/other folder.

Then add your file to the end of the first line of your configuration file and you should be all set.

example of the first line of my configuration file

Code: Select all

zzshrine 30 30 pics/walls/zzrust.dat pics/walls/zz_wall1.dat pics/other/zzshrinetitle.dat
Image
User avatar
dragonbait
Stalker
Posts: 775
Joined: Mon Apr 10, 2006 3:07 pm

Post by dragonbait »

Hey the forums are back online! :o

Anyways... where waz I?

Step 3: Items

Well, what is a mod if it doesn't have at least some new items right? Take a look at the Item Tutorial for a basic rundown of how items are assembled.

+ Within the Megamod zip, you can access the "items_BL2D" file which (hopefully) contains the complete items file. I'm not sure on that, but since others have added to it and used it for mods contained within the Megamod I assume its the full+complete version so we will use that to add any new items to. [please correct me if I'm wrong]

I plan on having allot of anti-magic on the main level so I figure why not make it possible to give some magic-users some good hand held weapons?

A sample new item specially made for Pyromancers...

Code: Select all

#
#
Type&#58; Melee Weapon
Name&#58; Molten Pitchfork
TypeID&#58; 900
Description&#58; This pitchfork glows red from its heat. It is lightweight, and hot like a pyro.
StatEffect&#58; +2 ST
StatEffect&#58; +1 DX
StatEffect&#58; -1 AC
StatEffect&#58; avoid fire damage
Location&#58; hand
Weight&#58; 1
Value&#58; 4000
Class&#58; Py Is
Damage&#58; 4d4+4
CreationSkill&#58; Magical Weapon
Recipe&#58; 3 Spear
Recipe&#58; 2 Power
Recipe&#58; 2 Light
#
One thing I thought strange is that (Type: Melee Weapon) doesn't seem to be used, or at least isn't used in the items shown in the "items_BL2D" file either in the Megamod zip or in the DWtools zip.

When I think of Melee Weapon, I tend to think of Mace, Flail, Club.....
Though Mace uses "Type: Blunt Weapon"

Sword... I know swords are used but they have "Type: Long Blade" or "Type: Short Blade".

Are there Halberds in DW? Or is it Halbards? I didn't find any in the items file and don't remember them within the game. Could be wrong though. May have to take a trip or two to the shops to see whats there. Anyone know the current Halberd situation?
Last edited by dragonbait on Fri Jan 20, 2012 5:11 pm, edited 1 time in total.
Post Reply